Dark Chocolate Sea Salt Nut Bars – Easy Recipe
Dark Chocolate and Sea Salt Nut Bars are a revelation for anyone seeking a sophisticated yet wonderfully simple treat. We all crave those moments of pure indulgence, right? That perfect balance of rich, deep chocolate and the unexpected, delightful pop of sea salt is precisely what makes these Dark Chocolate and Sea Salt Nut Bars so irresistible. They’re not just a snack; they’re a carefully crafted experience. Imagin extracte the satisfying crunch of toasted nuts, melded with the velvety smoothness of melted dark chocolate, all elevated by those shimmering crystals of sea salt that cut through the sweetness, awakening your taste buds with every bite. This recipe is special because it transforms humble ingredients into something truly extraordinary, a testament to how a few well-chosen elements can create magic. Get ready to discover your new favorite go-to for a moment of pure, unadulterated bliss.
Dark Chocolate and Sea Salt Nut Bars
There are few things more satisfying than a homemade treat that strikes the perfect balance between sweet, salty, and satisfyingly crunchy. These Dark Chocolate and Sea Salt Nut Bars are exactly that. They’re incredibly simple to make, requiring no baking, and are packed with wholesome ingredients that will keep you fueled. I love having these on hand for an afternoon pick-me-up, a quick breakfast on the go, or even a healthy-ish dessert. The combination of rich dark chocolate and a hint of flaky sea salt is simply irresistible.
The beauty of these bars lies in their adaptability. While I’ve provided my favorite nut combination, feel free to experiment with whatever you have in your pantry. Walnuts, pecans, pistachios – they all work wonderfully. The puffed rice adds a delightful lightness and crunch, preventing the bars from becoming too dense.
Ingredients:
Instructions:
1. Prepare Your Nuts and Baking Pan:
The first step is to get our nuts ready and prepare our pan. If you’re using whole nuts, give them a rough chop. I like to have a mix of textures, so some can be left whole or halved, while others are more finely chopped. This creates an interesting mouthfeel in the finished bars. You can do this by hand with a knife or pulse them gently in a food processor. Be careful not to turn them into a paste; we want discernible pieces. Next, prepare an 8×8 inch baking pan. Line it with parchment paper, leaving an overhang on the sides. This overhang will be your lifesaver for lifting the bars out of the pan once they’re set. Lightly grease the parchment paper as well to ensure everything releases cleanly.
2. Combine Dry Ingredients:
In a large mixing bowl, combine your chopped nuts and the puffed rice. Give them a good stir to distribute everything evenly. The puffed rice will add that essential lightness and crunch. Ensure your nuts are unsalted, as we’ll be adding salt later to control the flavor.
3. Create the Binding Syrup:
In a small saucepan, gently heat the brown rice syrup over medium-low heat. We don’t want to boil it aggressively, just warm it enough so it becomes more fluid and easier to mix. Stir in the vanilla extract and the 1/2 teaspoon of sea salt. The vanilla adds a lovely warmth and complexity, while the sea salt will enhance all the other flavors, especially the chocolate and the nuts. Stir until the salt is fully dissolved.
4. Combine and Press the Mixture:
Pour the warm syrup mixture over the nut and puffed rice mixture in the large bowl. Stir thoroughly, ensuring that every piece of nut and puffed rice is coated in the sticky syrup. This is where the magic happens, binding all those delicious ingredients together. Once everything is well combined and coated, transfer this mixture to your prepared baking pan. Use a spatula or the back of a spoon to press the mixture down firmly and evenly into the pan. This is a crucial step for creating bars that hold their shape. The firmer you press, the more cohesive your bars will be. You can even use a flat-bottomed glass or the bottom of another pan to get a really dense, even layer.
5. Chill and Prepare the Chocolate Topping:
Once the base mixture is pressed firmly into the pan, place the pan in the refrigerator for at least 30 minutes to allow it to firm up. This chilling period is essential before adding the chocolate. While the base is chilling, prepare your chocolate topping. In a small, microwave-safe bowl, combine the dark chocolate chips and the coconut oil. Microwave in 30-second intervals, stirring well after each interval, until the chocolate is mostly melted and smooth. Continue stirring until all lumps are gone and you have a glossy, pourable chocolate mixture. The coconut oil helps the chocolate melt more smoothly and also creates a slightly more pliable chocolate layer on the bars.
6. Add the Chocolate Layer and Finishing Touches:
Remove the pan from the refrigerator. Pour the melted dark chocolate mixture evenly over the chilled nut base. Use a spatula to spread it out to the edges, creating a smooth, even chocolate layer. If you’re using flaky sea salt for topping, sprinkle it generously over the still-wet chocolate. This adds a beautiful visual appeal and an extra pop of salty flavor with every bite.
7. Chill and Cut:
Return the pan to the refrigerator for at least 1 hour, or until the chocolate is completely set. The longer it chills, the firmer the bars will become. Once the chocolate is firm, use the parchment paper overhang to lift the entire slab out of the pan onto a cutting board. Using a sharp knife, cut the slab into your desired bar shapes. I usually cut mine into about 12-16 bars. Store the bars in an airtight container in the refrigerator for best results. They’ll stay fresh for up to a week. Enjoy these delightful, homemade treats!
Conclusion:
These Dark Chocolate and Sea Salt Nut Bars are a truly delightful treat, offering a perfect balance of rich, bittersweet chocolate, satisfying crunch from your favorite nuts, and a surprising pop of savory sea salt. They’re incredibly versatile, making them ideal for a quick energy boost, a sophisticated dessert, or even a thoughtful homemade gift. I’ve found they’re fantastic for curbing those afternoon cravings and always impress when I bring them to gatherings. The simplicity of the recipe, combined with the complex flavor profile, makes them a go-to for busy bakers like myself. Don’t be afraid to experiment with different nut combinations or even add a pinch of chili flakes for a spicy kick! I wholeheartedly encourage you to give these Dark Chocolate and Sea Salt Nut Bars a try – you won’t regret it!
Frequently Asked Questions:
Can I make these nut bars vegan?
Absolutely! To make these Dark Chocolate and Sea Salt Nut Bars vegan, simply ensure you’re using vegan dark chocolate chips. Many brands offer delicious vegan options. You’ll also want to confirm that any other ingredients you use, like binding agents, are also plant-based.
What are some good nut variations?
The beauty of these bars is their adaptability! Beyond almonds and walnuts, consider pecans, cashews, pistachios, or even macadamia nuts. You can also mix and match for a more complex nutty flavor. Toasted nuts will bring out an even deeper flavor profile.
How should I store these bars?
These bars store beautifully in an airtight container at room temperature for up to a week. For longer storage, they can be kept in the refrigerator, which will make them even firmer. You can also freeze them for several months; just let them thaw slightly before enjoying.
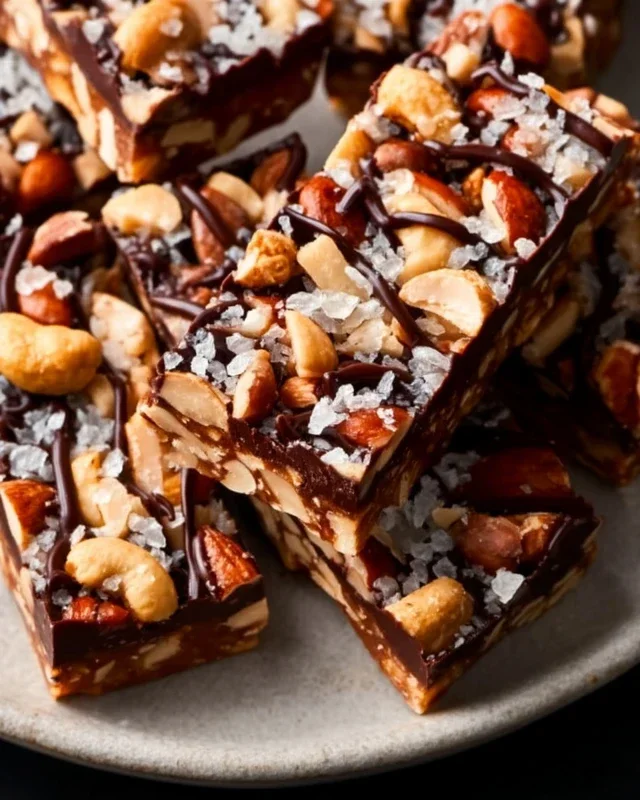
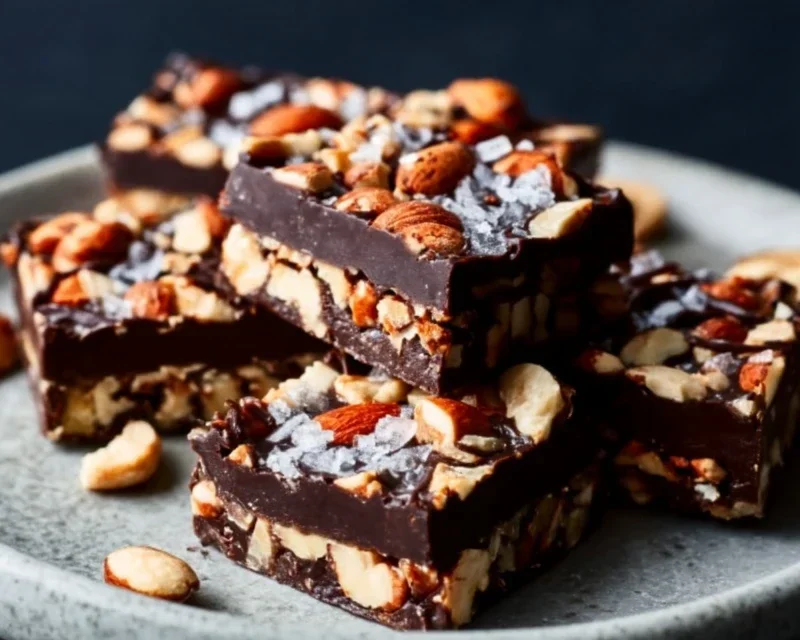
Dark Chocolate and Sea Salt Nut Bars
Decadent no-bake bars packed with nuts, puffed rice, and sea salt, drizzled with dark chocolate. A perfect sweet and salty treat.
Ingredients
-
2 1/2 cups unsalted nuts of choice (3/4 cup cashews, 3/4 cup peanuts, 1 cup almonds)
-
1/2 cup puffed rice
-
1/4 cup brown rice syrup
-
1 1/2 teaspoon vanilla extract
-
1/2 teaspoon sea salt
-
1 cup dark chocolate chips
-
2 teaspoons coconut oil
-
flaky salt for topping (optional)
Instructions
-
Step 1
Line an 8×8 inch baking pan with parchment paper, leaving an overhang on the sides. -
Step 2
In a large bowl, combine the chopped nuts and puffed rice. -
Step 3
In a small saucepan over medium heat, gently warm the brown rice syrup, vanilla extract, and sea salt until combined and slightly fluid. Do not boil. -
Step 4
Pour the warm syrup mixture over the nut and puffed rice mixture. Stir well to coat everything evenly. -
Step 5
Press the mixture firmly and evenly into the prepared baking pan. -
Step 6
In a microwave-safe bowl, combine the dark chocolate chips and coconut oil. Microwave in 30-second intervals, stirring between each, until smooth and melted. -
Step 7
Pour the melted chocolate over the nut mixture in the pan and spread evenly. Sprinkle with flaky salt, if using. -
Step 8
Refrigerate for at least 2-3 hours, or until the chocolate is firm. -
Step 9
Lift the bars out of the pan using the parchment paper overhang. Cut into desired bar sizes.
Important Information
Nutrition Facts (Per Serving)
It is important to consider this information as approximate and not to use it as definitive health advice.
Allergy Information
Please check ingredients for potential allergens and consult a health professional if in doubt.