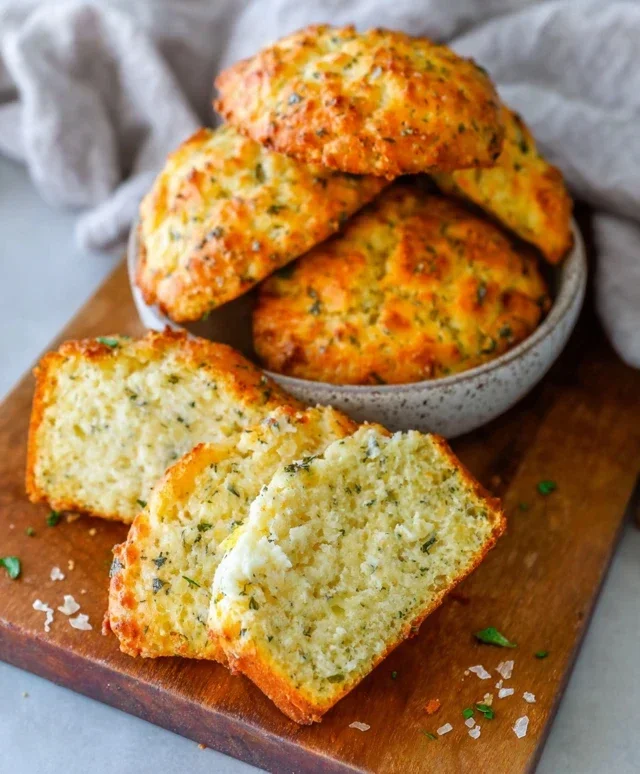
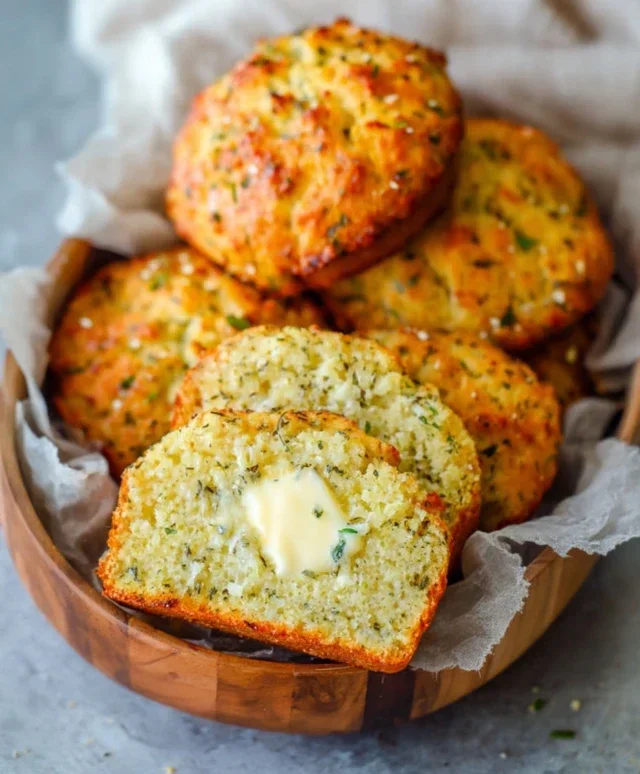
Garlic Butter Keto Bread – Easy Low Carb Loaf
Garlic Butter Keto Bread is the low-carb revelation you’ve been dreaming of, and I’m thrilled to share my absolute favorite recipe with you today. If you’ve been missing the comforting aroma and satisfying chew of a warm, crusty loaf while sticking to your ketogenic lifestyle, your search ends here. This isn’t just any keto bread; it’s an experience. Imagin extracte sinking your teeth into a slice, the rich, buttery flavor mingling with pungent garlic, all wrapped up in a tender, almost cloud-like crum extractb. People adore this Garlic Butter Keto Bread because it delivers on all the nostalgic promises of traditional bread without the carb count. What truly sets this recipe apart is its incredible ease of preparation and the remarkably authentic texture and taste it achieves, proving that delicious keto baking is not only possible but downright delightful.
Garlic Butter Keto Bread
Oh, the joy of finding a truly satisfying keto bread recipe! This Garlic Butter Keto Bread is a game-changer for anyone following a low-carb lifestyle. Forget those crum extractbly, dry disappointments. This recipe delivers a tender, flavorful, and wonderfully buttery bread that’s perfect for toasting, dipping, or enjoying as a side with your favorite keto meals. It’s surprisingly simple to make, and the aroma of garlic and butter baking will fill your kitchen with pure deliciousness. I’ve been testing and tweaking this for a while, and I’m thrilled to share what I think is the perfect balance of texture and taste. This bread is versatile, and once you try it, you’ll find yourself reaching for it again and again.
Ingredients:
Preparation and Baking:
Let’s get started on making this incredible keto bread! The key to a great loaf is to ensure your ingredients are at the right temperature, especially the eggs. Room temperature eggs incorporate better into the batter, leading to a smoother, more even texture.
First things first, preheat your oven to 350°F (175°C). This ensures the oven is at the perfect temperature from the moment your bread goes in, promoting even baking. Next, you’ll want to prepare your baking vessel. I like to use a standard 8×4 inch loaf pan. Grease it thoroughly with olive oil or your preferred cooking spray. You can also line it with parchment paper, leaving some overhang on the sides to help you lift the bread out easily once it’s baked. This step is crucial to prevent sticking and ensure a beautiful, intact loaf.
In a large mixing bowl, combine all the dry ingredients: the almond flour, coconut flour, baking powder, and salt. Whisk them together thoroughly. It’s important to get rid of any clumps in the flours, especially the almond flour, and ensure the baking powder and salt are evenly distributed. This creates a consistent base for our bread.
In a separate bowl, whisk together the wet ingredients. You’ll need your four room-temperature large eggs. Crack them into the bowl and whisk them until they are well combined and slightly frothy. Then, add the melted unsalted butter. Make sure the butter isn’t too hot, just melted and warm to the touch. Stir in the full-fat sour cream or Greek yogurt. The sour cream or yogurt adds moisture and a lovely tenderness to the bread, which can sometimes be a challenge with keto baking. Mix these wet ingredients until they are smooth and well incorporated.
Now comes the fun part: combining the wet and dry ingredients. Gradually add the wet ingredients to the dry ingredients, mixing as you go. You can use a spatula or a hand mixer on low speed for this. Be careful not to overmix. Mix just until everything is combined and you have a thick, batter-like consistency. The batter will be quite dense, which is normal for keto bread. Once the main batter is formed, gently fold in the chopped fresh parsley and the minced garlic. Distribute these flavorful additions evenly throughout the batter. The scent at this stage is already amazing!
Pour the batter into your prepared loaf pan, spreading it evenly with your spatula. Make sure to get into all the corners. You can gently tap the pan on the counter a couple of times to help settle the batter and release any air bubbles. This also helps create a flatter top on your bread.
Now it’s time to bake! Place the loaf pan in your preheated oven on the center rack. Bake for approximately 40-50 minutes. The exact baking time can vary depending on your oven, so keep an eye on it. You’ll know your bread is done when it’s golden brown on top, and a toothpick or a thin knife inserted into the center comes out clean. If the top is browning too quickly, you can loosely tent it with aluminum foil for the remainder of the baking time.
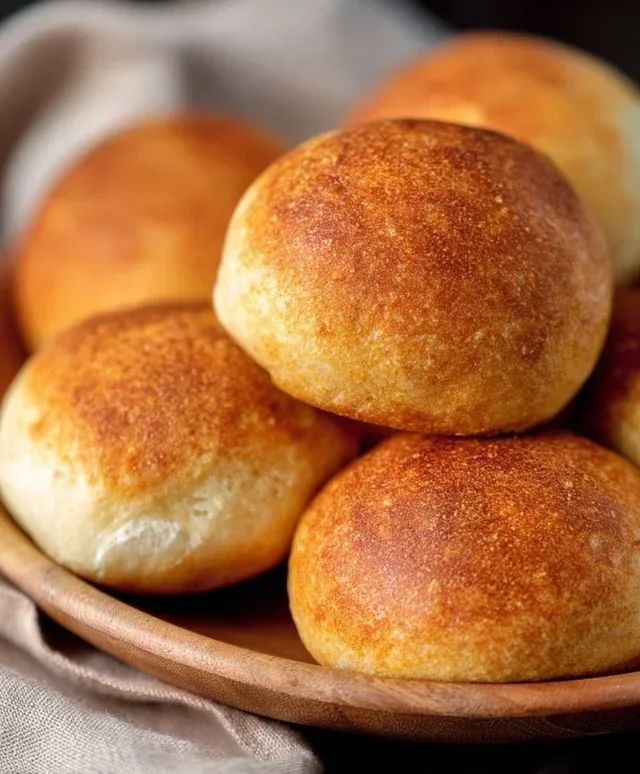
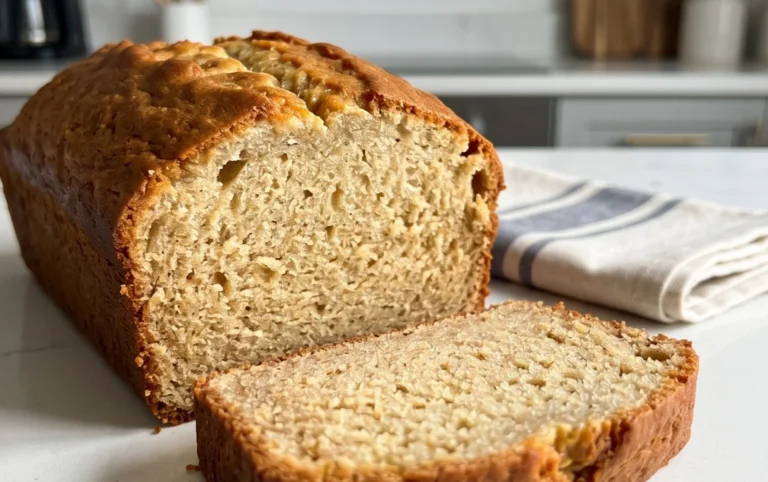
Once baked, remove the loaf pan from the oven and let the bread cool in the pan for about 10-15 minutes. This initial cooling period helps the bread firm up. After that, carefully invert the pan onto a wire rack to remove the bread. Allow the bread to cool completely on the wire rack before slicing. This is crucial for achieving clean slices and the best texture. Slicing hot keto bread can often lead to a gummy interior. Once completely cooled, you can slice it with a serrated knife and enjoy! This garlic butter keto bread is fantastic toasted and slathered with more butter, or served alongside your favorite low-carb soups and stews. Enjoy this delicious keto treat!
Conclusion:
I hope you’re as excited to try this Garlic Butter Keto Bread as I am to share it! This recipe is truly a game-changer for anyone following a ketogenic lifestyle, offering a delicious and satisfying bread alternative without the carb-heavy guilt. The rich, savory combination of garlic and butter, baked into a tender, keto-friendly loaf, makes it incredibly versatile. It’s perfect for dipping into your favorite soups, serving alongside a hearty stew, or even as a base for your morning avocado toast. Don’t be afraid to get creative with variations – adding fresh herbs like rosemary or chives can elevate the flavor even further. I’m confident you’ll love how simple this recipe is to make and how wonderfully it fits into your low-carb journey. Give it a whirl, and let me know what you think!
Frequently Asked Questions:
Q: Can I freeze this Garlic Butter Keto Bread?
A: Absolutely! Once cooled completely, you can wrap individual slices or the entire loaf tightly in plastic wrap and then in aluminum foil, or place them in an airtight freezer bag. It should stay fresh in the freezer for up to 2-3 months. Thaw at room temperature or gently warm it in a toaster oven or oven.
Q: What can I substitute for almond flour if I have a nut allergy?
A: For a nut-free option, you can try using sunflower seed flour. It has a similar texture and baking properties to almond flour, though it might impart a slightly different flavor. Coconut flour can also be used, but it’s much more absorbent, so you might need to adjust the liquid content of the recipe.
Garlic Butter Keto Bread
A quick and easy keto-friendly bread recipe featuring a delicious garlic butter flavor. Perfect for dipping or as a side.
Ingredients
-
1 cup almond flour
-
1/2 cup coconut flour
-
1 teaspoon baking powder
-
1/4 teaspoon salt
-
2 large eggs
-
1/4 cup melted butter
-
2 tablespoons minced garlic
-
1 tablespoon chopped fresh parsley
Instructions
-
Step 1
Preheat your oven to 350°F (175°C). Grease and line a small loaf pan with parchment paper. -
Step 2
In a large bowl, whisk together almond flour, coconut flour, baking powder, and salt. -
Step 3
In a separate bowl, whisk the eggs and then stir in the melted butter. -
Step 4
Add the wet ingredients to the dry ingredients and mix until a dough forms. Stir in the minced garlic and chopped parsley. -
Step 5
Press the dough evenly into the prepared loaf pan. -
Step 6
Bake for 20-25 minutes, or until golden brown and a toothpick inserted into the center comes out clean. -
Step 7
Let the bread cool in the pan for 10 minutes before transferring it to a wire rack to cool completely.
Important Information
Nutrition Facts (Per Serving)
It is important to consider this information as approximate and not to use it as definitive health advice.
Allergy Information
Please check ingredients for potential allergens and consult a health professional if in doubt.