Easy No-Bake Banoffee Cheesecake Recipe
No-Bake Banoffee Cheesecake is the dessert that dreams are made of, and trust me, you don’t even need to turn on your oven to bring this dream to life! If you’re anything like me, you adore the irresistible combination of rich caramel, sweet bananas, and creamy, dreamy cheesecake. This classic British dessert, reimagin extracted as a spectacular no-bake cheesecake, takes all those beloved elements and elevates them into a truly show-stopping creation. It’s the perfect antidote to a hot day or when you’re craving something decadent without the fuss. What makes our No-Bake Banoffee Cheesecake so special? It’s the harmonious marriage of textures and flavors: a crunchy biscuit base, a thick layer of luscious dulce de leche or caramel, perfectly ripe banana slices, and a cloud-like cream cheese filling, all topped off with a generous swirl of whipped cream and chocolate shavings. It’s a guaranteed crowd-pleaser and surprisingly simple to assemble, making it my go-to for any occasion.
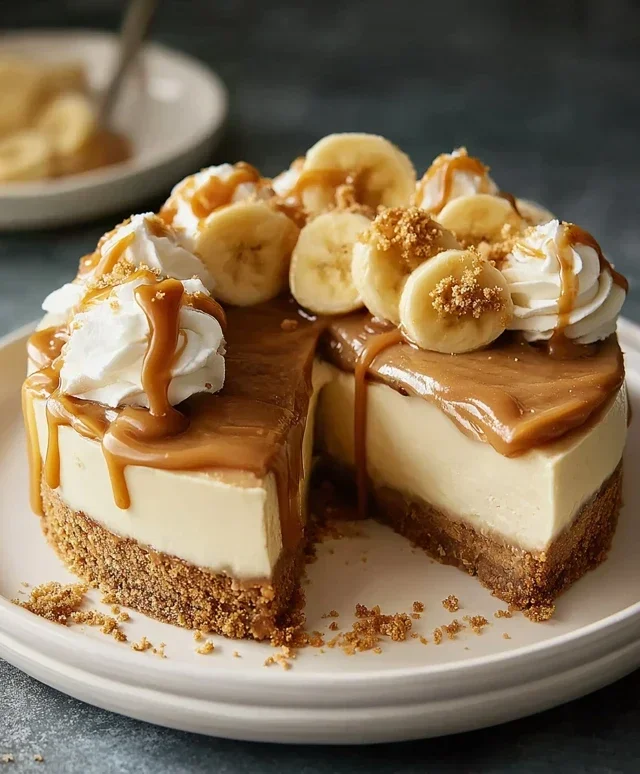
No-Bake Banoffee Cheesecake
Get ready to indulge in a slice of pure bliss with this incredibly easy no-bake Banoffee Cheesecake. This dessert is a delightful fusion of creamy, caramel-y, and banana goodness, all without turning on the oven. Perfect for a quick treat, a party showstopper, or simply when that sweet craving strikes, this recipe is designed to impress with minimal effort. The rich biscuit base, smooth and tangy cream cheese filling, luscious caramel, and sweet banana create a symphony of flavors and textures that will have everyone asking for seconds. We’re using a wonderful combination of ingredients to ensure a truly decadent experience, and the best part is, it comes together in no time!
Ingredients:
Preparing the Base
The foundation of our no-bake Banoffee Cheesecake is a crisp, buttery biscuit base. This step is crucial for providing a satisfying crunch that contrasts beautifully with the creamy filling.
1. Start by crushing the plain biscuits. You can do this by placing them in a sturdy plastic bag and using a rolling pin to bash them into fine crum extractbs. Alternatively, a food processor will achieve this quickly and efficiently. Aim for a fine, breadcrum extractb-like consistency.
2. Melt the dairy-free butter or margarine in a small saucepan over low heat or in the microwave. Once melted, pour the melted butter over the biscuit crum extractbs. Stir everything together thoroughly until all the crum extractbs are evenly coated with the butter. This ensures the base will hold its shape once pressed into the tin.
3. Take a 20cm (8-inch) springform cake tin and line the base with parchment paper for easy removal. Spoon the buttered biscuit crum extractb mixture into the prepared tin. Use the back of a spoon or the bottom of a glass to press the crum extractbs down firmly and evenly across the base of the tin. Make sure to create a compact layer; this is what will prevent the base from crum extractbling when you slice the cheesecake. Place the tin in the refrigerator for at least 30 minutes to allow the base to set while you prepare the filling.
Crafting the Creamy Filling
Now, let’s move on to the star of the show: the lusciously smooth and tangy cream cheese filling. This no-bake method relies on the richness of dairy-free cream cheese and the subtle sweetness of cashews for an irresistible texture.
4. Drain the pre-soaked cashew nuts thoroughly. Add the drained cashews to a high-powered blender or food processor. Add the dairy-free cream cheese, coconut cream, and icing sugar to the blender. Blend on high speed until the mixture is completely smooth and creamy. This might take a few minutes, and you may need to scrape down the sides of the blender a couple of times to ensure all the cashews are incorporated. The goal is a silky-smooth consistency with no graininess.
5. Once the filling is perfectly smooth, gently fold in about half of the vegan caramel sauce. You don’t want to fully incorporate it; instead, aim for beautiful swirls of caramel throughout the cream cheese mixture. This will create a marbled effect and pockets of intense caramel flavor in every bite.
6. Retrieve the chilled biscuit base from the refrigerator. Pour the creamy filling mixture over the set base. Use a spatula to spread the filling evenly, creating a smooth top.
Assembling and Chilling
The final steps involve layering on more deliciousness and allowing the cheesecake to set to perfection.
7. Slice the medium-sized banana into rounds and arrange them evenly over the top of the cream cheese filling. Gently press them down slightly so they nestle into the filling.
8. Drizzle the remaining vegan caramel sauce generously over the banana slices and the top of the cheesecake. You can create patterns or just a free-flowing drizzle – whatever looks most tempting!
9. Cover the springform tin with plastic wrap or foil. Place the cheesecake in the refrigerator and chill for at least 4-6 hours, or preferably overnight, until it is completely firm and set. The longer it chills, the better it will hold its shape when sliced.
Finishing Touches and Serving
The grand finnon-alcoholic ale! We’ll whip up some dairy-free cream and add final decorative touches to make this Banoffee Cheesecake truly spectacular.
10. Just before serving, whip the dairy-free whipping cream until soft peaks form. You can add a tablespoon of icing sugar if you prefer a sweeter cream, but the caramel and banana should provide plenty of sweetness. Carefully remove the sides of the springform tin. Use a sharp knife dipped in hot water (and dried) to slice the cheesecake.
11. Decorate the top of the cheesecake with dollops of the whipped dairy-free cream and a few extra fresh banana slices. For an extra touch of indulgence, drizzle a little more vegan caramel sauce over the whipped cream. Serve immediately and enjoy the irresistible combination of flavors and textures. This no-bake wonder is sure to become a firm favorite!

Conclusion:
I hope you’ve enjoyed learning how to make this incredible no-bake Banoffee Cheesecake! This recipe is truly a showstopper with its effortless preparation and absolutely divine flavor combination. The creamy, dreamy cheesecake filling, paired with the sweet, sticky toffee sauce and fresh bananas, all atop a buttery biscuit base, creates a dessert that’s both decadent and surprisingly simple to achieve. It’s the perfect solution when you crave a sophisticated dessert without the fuss of baking, making it ideal for busy weeknights or impromptu gatherings. I genuinely encourage you to give this no-bake Banoffee Cheesecake a try; I promise you won’t be disappointed!
Serving this beauty is easy peasy. A simple slice on its own is perfection, but consider a dollop of whipped cream or a drizzle of extra toffee sauce for that extra touch of indulgence. For variations, you could add a scattering of chocolate shavings over the top, or even infuse the biscuit base with a hint of coffee for a mocha twist. Don’t be afraid to experiment and make it your own!
Frequently Asked Questions:
Can I make this cheesecake ahead of time?
Absolutely! In fact, it’s highly recommended. The cheesecake needs at least 4-6 hours in the refrigerator to set properly. Making it the day before is ideal, allowing all the flavors to meld together beautifully.
What kind of biscuits are best for the base?
Digestive biscuits are a classic and work wonderfully. Grabeef ham crackers are also a fantastic alternative. The key is to use a relatively plain, slightly sweet biscuit that will crum extractble well and create a sturdy, flavorful base for your no-bake Banoffee Cheesecake.
My toffee sauce is too thick or too thin, what can I do?
If your toffee sauce is too thick, gently warm it over low heat and stir in a tablespoon of cream or milk at a time until it reaches your desired consistency. If it’s too thin, you can try simmering it for a few extra minutes to allow some of the liquid to evaporate. Be patient and stir constantly to avoid burning.
No-Bake Banoffee Cheesecake
A delicious and easy no-bake banoffee cheesecake with a biscuit base, creamy cashew filling, and layers of banana and caramel.
Ingredients
-
200g plain biscuits (use gluten-free biscuits if required)
-
100g dairy-free butter or margarine
-
140g cashew nuts (pre-soaked in warm water overnight)
-
340g dairy-free cream cheese
-
50g coconut cream
-
80g icing sugar
-
1 medium-sized banana
-
Vegan caramel sauce
-
Fresh banana slices
-
80ml dairy-free whipping cream
Instructions
-
Step 1
Crush the plain biscuits into fine crumbs and mix with the melted dairy-free butter or margarine. Press this mixture into the base of a 20cm (8 inch) springform tin. -
Step 2
Drain the soaked cashew nuts and blend them in a food processor until very smooth. Add the dairy-free cream cheese, coconut cream, and icing sugar, and blend again until completely smooth and creamy. -
Step 3
Slice the medium-sized banana and arrange the slices over the biscuit base. -
Step 4
Pour the cashew cream mixture over the banana slices and smooth the top with a spatula. -
Step 5
Drizzle generously with vegan caramel sauce. -
Step 6
Whip the dairy-free whipping cream until stiff peaks form. Dollop or pipe the whipped cream decoratively over the cheesecake. -
Step 7
Arrange fresh banana slices on top of the whipped cream for garnish. Chill the cheesecake in the refrigerator for at least 4 hours, or until firm.
Important Information
Nutrition Facts (Per Serving)
It is important to consider this information as approximate and not to use it as definitive health advice.
Allergy Information
Please check ingredients for potential allergens and consult a health professional if in doubt.