Easy Homemade Bread Recipe – Simple & Delicious
Easy Homemade Bread isn’t just a recipe; it’s an invitation to a cozy kitchen and the irresistible aroma of freshly baked goodness. Have you ever dreamt of pulling a golden-brown loaf, still warm from the oven, right from your own kitchen? It’s a feeling of accomplishment and pure comfort that’s hard to beat. The beauty of this easy homemade bread lies in its simplicity. Forget complicated techniques and intimidating ingredients; this recipe is designed for busy weeknights and weekend baking adventures alike. What truly makes this dish special is the incredible flavor and texture you achieve with minimal effort. It’s a humble loaf, yes, but one that speaks volumes about the satisfaction of creating something delicious from scratch. Get ready to impress yourself (and anyone lucky enough to share it) with this foolproof method for truly wonderful easy homemade bread.
Why You’ll Love This Recipe:
Simple Ingredients, Incredible Results
The Ultimate Comfort Food Experience
Impressive Homemade Taste, Effortless Preparation
Easy Homemade Bread
There’s something incredibly satisfying about pulling a warm, crusty loaf of bread from your own oven. The aroma alone can transform a kitchen into a cozy haven. Many people shy away from baking bread, believing it’s a complicated and time-consuming endeavor. I’m here to tell you that it doesn’t have to be! This recipe for Easy Homemade Bread is designed for simplicity, requiring minimal fuss and delivering fantastic results. You’ll be amazed at how straightforward it is to create delicious, fresh bread that will have your family and friends singin extractg your praises. Forget those store-bought loaves that taste like cardboard; with just a few basic ingredients and a little patience, you can achieve bakery-quality bread in your own home.
Ingredients:
Getting Started: The Dough
This is where the magic begin extracts! In a large mixing bowl, combine the warm water and the instant yeast. Give it a gentle stir. The warmth of the water is crucial for activating the yeast, but be careful not to make it too hot, as that can kill the yeast. You want it to feel comfortably warm on your wrist, like a baby’s bathwater. Let this mixture sit for about 5 minutes. You should start to see a little foamy action on the surface, which indicates that your yeast is alive and ready to work its magic. If you don’t see any bubbles, your yeast might be old or the water might have been too hot or too cold. In that case, it’s best to start with fresh yeast and re-check your water temperature.
Next, add the bread flour and kosher salt to the bowl. Bread flour contains a higher protein content than all-purpose flour, which contributes to a better structure and chewier texture in your bread. However, all-purpose flour will still yield a wonderfully tasty loaf, so don’t worry if that’s what you have on hand. The salt is essential not only for flavor but also for controlling the yeast’s activity and strengthening the gluten structure of the dough.
Now, it’s time to bring it all together. Using a sturdy spoon or a dough whisk, start mixing the ingredients until a shaggy dough forms. It will look a bit messy and sticky at this stage, and that’s perfectly normal. Don’t be tempted to add too much extra flour at this point; you want a slightly wet dough to begin extract with. Once the ingredients are mostly combined, turn the dough out onto a lightly floured surface.
Kneading the Dough
This is perhaps the most “active” part of bread-making, but it’s also quite therapeutic. Kneading develops the gluten in the flour, which gives bread its structure and elasticity. Dust your hands and the work surface with a little extra flour. Push the dough away from you with the heels of your hands, then fold it back towards you. Rotate the dough a quarter turn and repeat the process. You’re looking for the dough to transform from a sticky, unmanageable mass into a smooth, elastic ball. It should feel soft and slightly tacky to the touch, but it shouldn’t stick to your fingers excessively. This process typically takes about 8-10 minutes of consistent kneading. If you have a stand mixer with a dough hook, you can use that on a low speed for about 6-8 minutes. The dough should pull away from the sides of the bowl and become smooth and elastic.
First Rise: The Patience Game
Once your dough has been kneaded to perfection, it’s time to let it rest and rise. Lightly grease a clean bowl with a little oil. Place the dough in the bowl, turning it to coat all sides with oil. This prevents the dough from drying out. Cover the bowl tightly with plastic wrap or a damp kitchen towel. Find a warm, draft-free spot for your dough to rise. This could be in a slightly warmed oven (turned off!), on top of your refrigerator, or simply on your counter if your kitchen is warm. The dough needs to double in size, which usually takes about 1 to 1.5 hours, depending on the temperature of your room. You’ll know it’s ready when it looks puffy and has noticeably increased in volume. Don’t rush this step; it’s crucial for developing flavor and texture.
Shaping and Second Rise
When your dough has doubled in size, gently punch it down to release the air. This deflates the dough and prepares it for its final shape. Turn the dough out onto a lightly floured surface again and gently shape it into your desired loaf. You can create a classic round boule, an oval bâtard, or even divide it into smaller rolls. For a simple loaf, gently pat the dough into a rectangle and then roll it up tightly, pinching the seam closed. Place your shaped dough on a baking sheet lined with parchment paper or in a greased loaf pan.
Now, it’s time for its second rise. Cover the shaped dough loosely with plastic wrap or a clean kitchen towel and let it rise again in a warm place for another 30-45 minutes, or until it has visibly puffed up and looks almost doubled in size again. This second rise is important for creating a light and airy interior crum extractb.
Baking to Golden Perfection
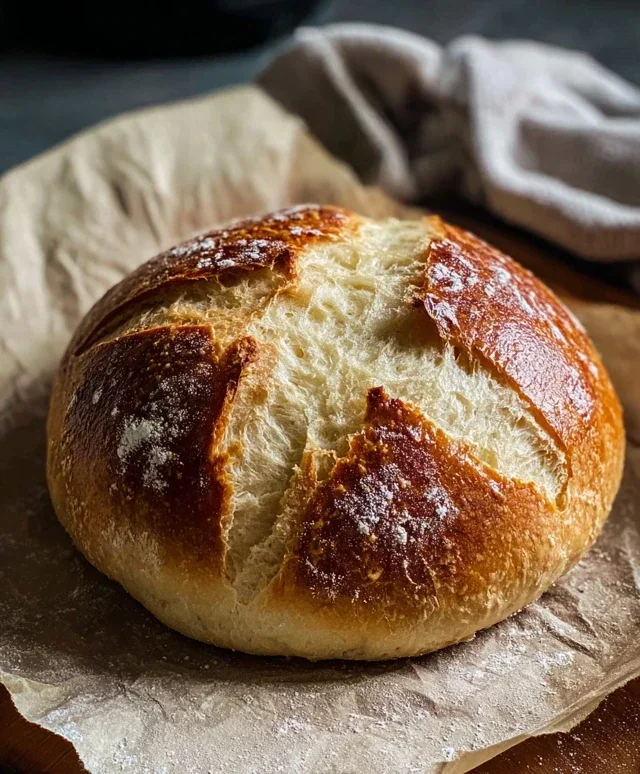
Preheat your oven to 400°F (200°C) during the second rise. Once the dough has completed its second rise and the oven is hot, it’s time to bake! If you want a beautifully crisp crust, you can score the top of the loaf with a sharp knife or lame (a special bread-scoring tool) before baking. This allows the bread to expand evenly in the oven.
Carefully place the baking sheet or loaf pan into the preheated oven. For an extra crisp crust, you can create steam in your oven. One way to do this is to place a shallow pan filled with hot water on the bottom rack of the oven when you preheat it. Bake for 30-40 minutes, or until the crust is deep golden brown and the bottom of the loaf sounds hollow when tapped. If you’re using a loaf pan, you might need to gently loosen the bread from the sides to check the bottom.
Once baked, immediately remove the bread from the pan and place it on a wire rack to cool completely. This is probably the hardest part – waiting for it to cool! Cutting into hot bread can result in a gummy texture. Resist the urge and let it cool for at least an hour. The aroma will be non-intoxicating, but the wait is well worth it. Enjoy your delicious, homemade bread!
Conclusion:
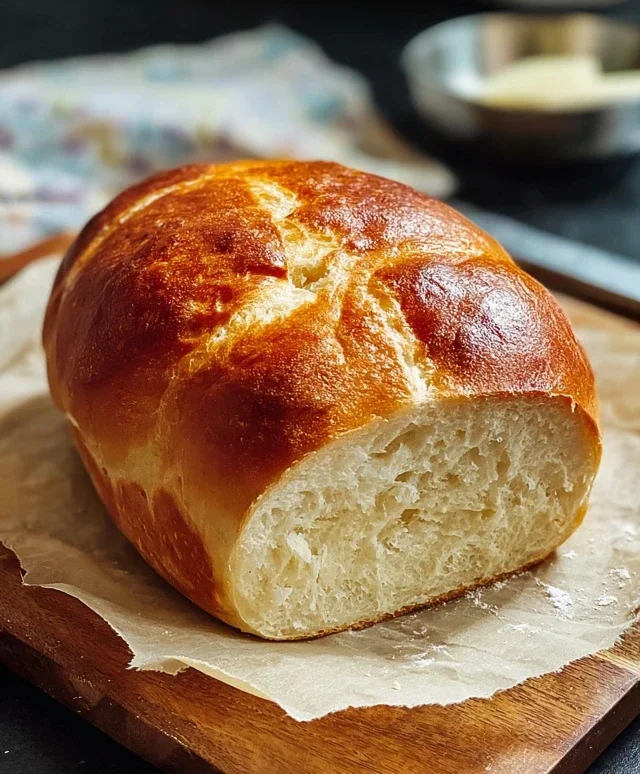
And there you have it! This easy homemade bread recipe is a testament to how simple and rewarding baking can be. You’ve seen how just a few basic ingredients, minimal fuss, and a little patience can yield a loaf that rivals anything you’d buy from a bakery. The aroma filling your kitchen as it bakes is reason enough to try this recipe, not to mention the incredibly satisfying taste and texture of fresh, warm bread. It’s perfect for sharing with loved ones or enjoying all by yourself.
Imagin extracte this beautiful loaf toasted golden brown with a generous slathering of butter, or used as the base for hearty sandwiches. It’s also fantastic alongside soups and stews, or simply torn and dipped in olive oil. Feel free to experiment with variations! Add a sprinkle of herbs like rosemary or thyme to the dough, or mix in some grated cheese for a savory twist. For a touch of sweetness, a handful of raisins or dried cranberries can transform it into a delightful breakfast bread.
Don’t be intimidated if this is your first time baking bread. This recipe is designed for success, and the results will surely boost your confidence. So, gather your ingredients and give it a go. I promise, you’ll be hooked!
Frequently Asked Questions:
Can I make this bread ahead of time?
Absolutely! Once cooled, you can store your homemade bread at room temperature in a bread box or a loosely tied plastic bag for 2-3 days. For longer storage, slice it and freeze it. You can then toast slices directly from frozen.
My dough didn’t rise much. What went wrong?
Several factors can affect dough rise. Ensure your yeast was fresh and activated properly in warm (not hot!) liquid. Also, check the ambient temperature of your kitchen; a warmer environment promotes better yeast activity. Sometimes, a slightly cooler environment just means a longer proofing time.
Easy Homemade Bread
A simple and satisfying recipe for homemade bread using basic pantry staples.
Ingredients
-
1 ½ cups warm water
-
3 cups bread flour
-
1 packet (2 ¼ teaspoons) Instant Yeast
-
2 ½ tsp kosher salt
-
2 tablespoons olive oil
Instructions
-
Step 1
In a large bowl, combine the warm water and yeast. Let it sit for 5-10 minutes until foamy. -
Step 2
Add the bread flour, kosher salt, and olive oil to the bowl. -
Step 3
Mix until a shaggy dough forms. Turn the dough out onto a lightly floured surface and knead for 5-7 minutes until smooth and elastic. -
Step 4
Place the dough in a greased bowl, cover with plastic wrap or a clean towel, and let it rise in a warm place for 1-1.5 hours, or until doubled in size. -
Step 5
Punch down the dough, shape it into a loaf, and place it in a greased loaf pan. -
Step 6
Cover and let it rise again for another 30-45 minutes. -
Step 7
Preheat your oven to 400°F (200°C). Bake for 30-35 minutes, or until golden brown and the internal temperature reaches 190-200°F (88-93°C).
Important Information
Nutrition Facts (Per Serving)
It is important to consider this information as approximate and not to use it as definitive health advice.
Allergy Information
Please check ingredients for potential allergens and consult a health professional if in doubt.