Renee Paj- Delicious Family Favorite Recipe
Renee Paj is a dish that holds a special place in my heart, and I know it does for so many of you too. There’s a certain magic that happens when these comforting flavors come together, a symphony of savory and sweet that instantly transports you to a happy memory. Why do we all love Renee Paj so much? It’s more than just a meal; it’s an experience. It’s the perfect balance of tender, melt-in-your-mouth textures and a rich, deeply satisfying taste that never fails to bring a smile to my face. What truly makes this Renee Paj recipe stand out is its inherent simplicity, allowing the quality of the ingredients to shine, while still offering layers of delicious complexity. Get ready to discover (or rediscover!) the joy of creating this beloved classic in your own kitchen.

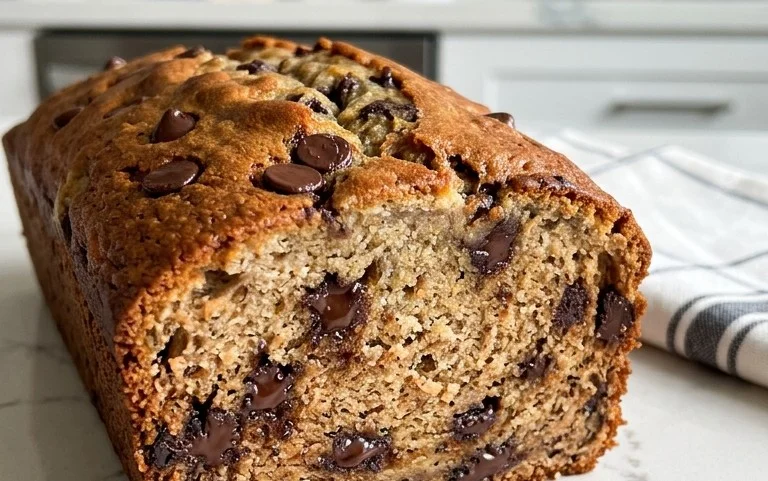
Renee’s Amazing Banana Oat Paj
There’s something incredibly comforting about a warm, homemade baked treat, especially when it features the sweetness of ripe bananas and the wholesome goodness of oats. This recipe, lovingly called “Renee’s Banana Oat Paj” (because it’s so cozy and satisfying, it feels like a warm hug!), is a delightful fusion of a moist banana bread and a tender oat crum extractble. It’s perfect for a weekend brunch, an afternoon snack, or even a not-too-sweet dessert. What I love most about this recipe is how forgiving it is, and how the simple ingredients come together to create something truly special. The natural sweetness of the bananas reduces the need for excessive sugar, and the oats add a wonderful texture and depth of flavor. Let’s get baking!
Ingredients:
Cooking Instructions
Step 1: Prepare Your Baking Vessel and Preheat Your Oven
The first step to baking anything delicious is to get your oven ready and your baking pan prepared. Preheat your oven to 350 degrees Fahrenheit (175 degrees Celsius). This consistent temperature is crucial for even baking, ensuring your Banana Oat Paj cooks through without burning on the outside or remaining doughy in the center. For this recipe, I find an 8×8 inch baking dish works perfectly. Grease it well with butter or cooking spray, and then lightly dust it with flour. This extra layer of preparation ensures that your beautiful Paj will release cleanly from the pan once it’s baked, preventing any frustrating sticking. If you don’t have an 8×8 pan, a 9-inch round cake pan or even a loaf pan can work, but you might need to adjust the baking time slightly.
Step 2: Mash the Bananas and Combine Wet Ingredients
In a medium-sized bowl, it’s time to bring the star of our show to life – the bananas! The riper, the better for this recipe. Those spotty, even brown bananas have the most intense sweetness and the softest texture, which will translate beautifully into your Paj. Using a fork or a potato masher, mash the banana chunks until they are mostly smooth with just a few small lumps remaining. Don’t worry about getting them perfectly pureed; those little banana bits will add character to your finished bake. To this mashed banana, add your two large eggs, the pure vanilla extract, and the 3 tablespoons of cooking oil. Whisk everything together until it’s well combined and looks like a lovely, creamy mixture. The oil will contribute to the moisture and tenderness of the final product, making it incredibly satisfying to eat.
Step 3: Combine Dry Ingredients and Integrate Them
In a separate, larger bowl, let’s combine all of our dry ingredients. This ensures that the leavening agents (baking soda and baking powder) are evenly distributed, which is key for a good rise and a tender crum extractb. Add the 1 cup of old fashioned oats. These oats provide a wonderful texture and a slightly nutty flavor that complements the banana beautifully. Next, add the 1 1/4 cups of all-purpose flour, the 1/2 cup of packed light brown sugar, the 1/2 teaspoon of kosher salt, the 1/2 teaspoon of baking soda, the 1/4 teaspoon of baking powder, and the 1/2 teaspoon of ground cinnamon. Give all of these dry ingredients a good whisk to ensure they are thoroughly mixed. Now, create a little well in the center of the dry ingredients and pour in your mashed banana and wet ingredient mixture. Using a spatula or a wooden spoon, gently fold the wet ingredients into the dry ingredients until just combined. It’s important not to overmix at this stage. Overmixing can develop the gluten in the flour too much, leading to a tougher Paj. A few streaks of flour are perfectly fine. If you’re using the optional chopped walnuts, gently fold them in now. Their crunch adds another delightful dimension to the Paj.
Step 4: Bake Until Golden and Set
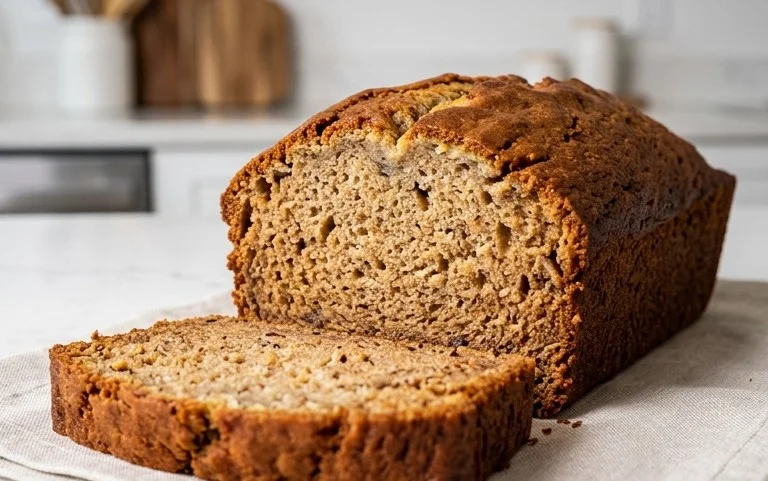
Pour the batter evenly into your prepared 8×8 inch baking dish. Gently spread it out with your spatula so that the surface is relatively even. Now, it’s time to bake! Place the dish in your preheated oven. Bake for approximately 30-35 minutes. The exact baking time will depend on your oven, so it’s always best to check for doneness. You’ll know your Banana Oat Paj is ready when the edges are golden brown and slightly pulled away from the sides of the pan, and the center is set. To test for doneness, insert a toothpick into the center of the Paj. If it comes out clean or with a few moist crum extractbs attached (but no wet batter), it’s perfectly baked. If there’s still wet batter, give it another 5 minutes in the oven and check again. The aroma filling your kitchen at this point will be absolutely divine – a sweet blend of banana, cinnamon, and toasted oats.
Step 5: Cool and Enjoy Your Delicious Creation
Once your Banana Oat Paj is out of the oven, resist the urge to cut into it immediately! This is a crucial step for achieving the best texture. Let the Paj cool in the baking dish on a wire rack for at least 15-20 minutes. This allows it to continue setting and firms up, making it easier to slice without crum extractbling apart. Once it’s cooled for a bit, you can either serve it directly from the dish or carefully invert it onto a cutting board to slice. I love serving this warm, perhaps with a dollop of whipped cream or a drizzle of honey, but it’s equally delicious at room temperature. It stores well at room temperature in an airtight container for a couple of days, or in the refrigerator for longer. This Renee’s Banana Oat Paj is a testament to how simple ingredients can create something truly heartwarming and delicious. Enjoy every single bite!

Conclusion:
I hope you’re as excited as I am to try this delightful Renee Paj recipe! It’s truly a showstopper, offering a wonderful balance of sweet and tart flavors with a beautifully tender texture. This dessert is fantastic because it’s surprisingly approachable for home bakers, yet delivers impressive results worthy of any special occasion. The rich, creamy filling nestled within a buttery, crisp crust is simply irresistible. Whether you’re a seasoned baker or looking for a new dessert to master, I wholeheartedly encourage you to give this Renee Paj a go. I’m confident it will become a new favorite in your culinary repertoire.
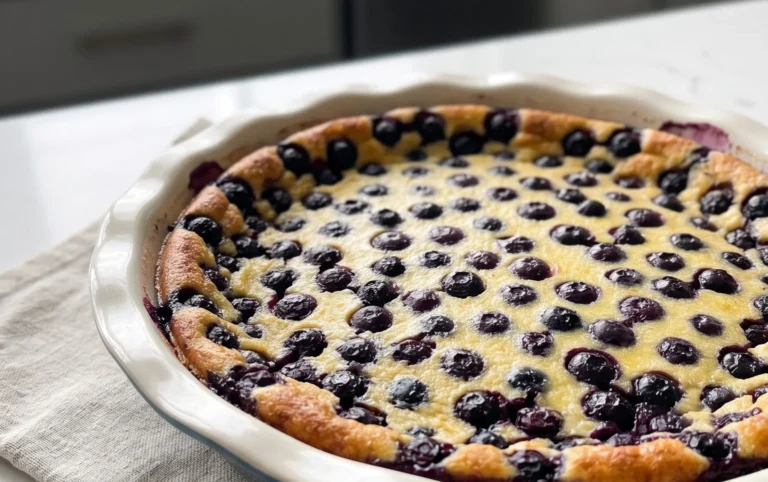
To elevate your experience, consider serving this Renee Paj warm, perhaps with a dollop of freshly whipped cream or a scoop of vanilla bean ice cream. For a touch of elegance, a sprinkle of toasted slivered almonds or a dusting of powdered sugar can be a lovely addition. Don’t be afraid to experiment with variations! You could introduce a hint of cinnamon or nutmeg to the filling for added warmth, or even incorporate a few fresh berries alongside the main fruit for a burst of extra color and flavor. The possibilities are truly endless!
Frequently Asked Questions:
Can I make the crust ahead of time?
Absolutely! The crust for this Renee Paj can be prepared a day in advance and stored, covered, in the refrigerator. You can even blind bake it partially beforehand for an even quicker assembly on baking day. Just be sure to bring it back to room temperature before proceeding with the filling.
What other fruits can I use in this Renee Paj?
While the classic version is wonderful, feel free to get creative! Apples, pears, or even a mix of berries would work beautifully in place of or in addition to the traditional fruit. Just ensure your fruit is sliced or diced to a similar size for even cooking.
Renee Paj
A delicious and moist banana bread-like cake, perfect for breakfast or dessert.
Ingredients
-
1 cup old fashioned oats
-
1 1/4 cups all purpose flour
-
1/2 cup light brown sugar, packed
-
1/2 tsp. kosher salt
-
1/2 tsp. baking soda
-
1/4 tsp. baking powder
-
1/2 tsp. ground cinnamon
-
3 large, ripe bananas, cut into chunks
-
2 large eggs
-
1 tsp. pure vanilla extract
-
3 TBSP cooking oil
-
1/3 cup chopped walnuts
Instructions
-
Step 1
Preheat oven to 350°F (175°C). Grease and flour a 9×5 inch loaf pan. -
Step 2
In a large bowl, whisk together the flour, brown sugar, salt, baking soda, baking powder, and cinnamon. -
Step 3
In a separate bowl, mash the bananas until mostly smooth. Stir in the eggs and vanilla extract. -
Step 4
Add the wet ingredients to the dry ingredients and mix until just combined. Stir in the cooking oil and oats. If using, fold in the chopped walnuts. -
Step 5
Pour the batter into the prepared loaf pan and spread evenly. -
Step 6
Bake for 50-60 minutes, or until a wooden skewer inserted into the center comes out clean. -
Step 7
Let cool in the pan for 10 minutes before transferring to a wire rack to cool completely.
Important Information
Nutrition Facts (Per Serving)
It is important to consider this information as approximate and not to use it as definitive health advice.
Allergy Information
Please check ingredients for potential allergens and consult a health professional if in doubt.