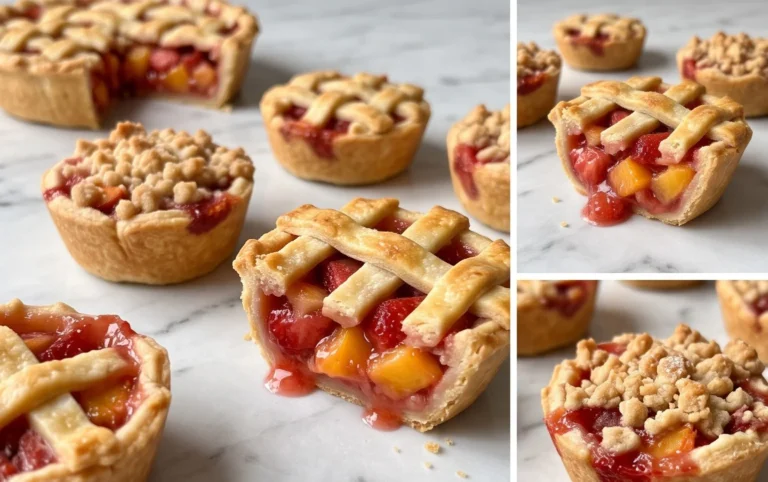
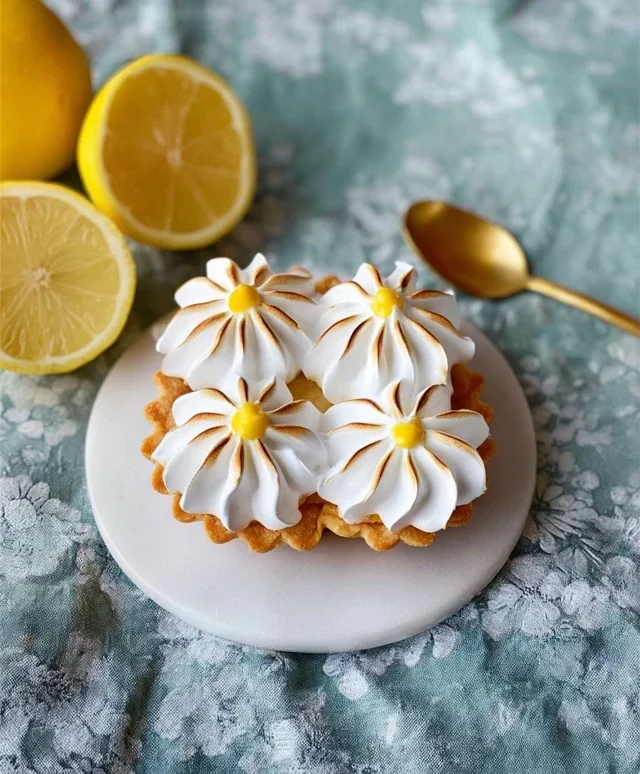
Daisy Lemon Meringue Pies- Zesty Delight
Daisy Lemon Meringue Pies are more than just a dessert; they’re sunshine in a bite, a whimsical delight that brightens any occasion. Have you ever encountered that perfect balance of tart citrus and ethereal sweetness, all cradled in a crisp, buttery crust? That’s the magic of a truly exceptional lemon meringue pie, and our Daisy Lemon Meringue Pie recipe elevates it to an art form. We adore this classic for its comforting familiarity and its surprisingly sophisticated flavor profile. What makes our Daisy Lemon Meringue Pies truly special is not just the vibrant, zesty lemon filling, but the crown of fluffy, golden meringue that beckons you to dive in. It’s a dessert that evokes fond memories, sparks conversation, and, quite frankly, tastes like pure happiness. Get ready to impress yourself and everyone you share it with!
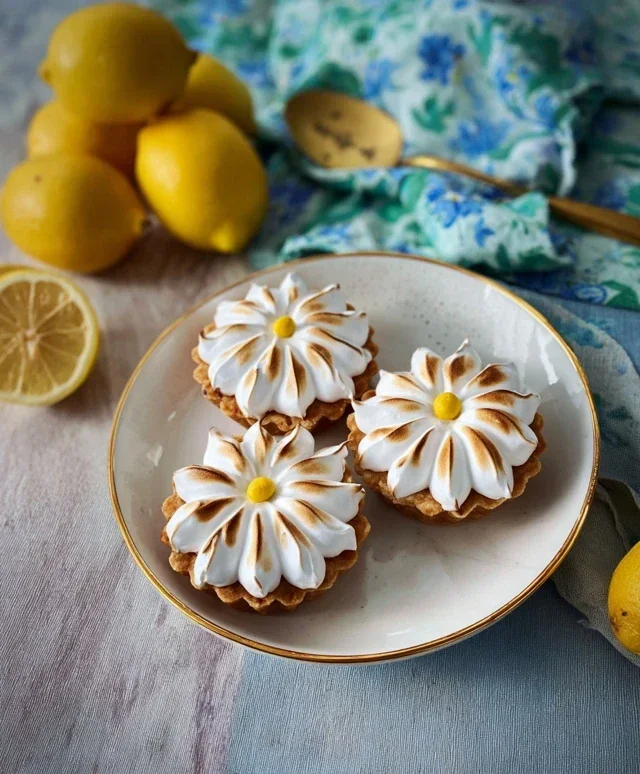
Daisy Lemon Meringue Pies
There’s something incredibly cheerful and bright about a lemon meringue pie, isn’t there? The sunshine-yellow filling, the fluffy white cloud of meringue – it’s pure joy in a pie shell. And when you add a delicate daisy touch? Well, that’s just taking happiness to the next level! These Daisy Lemon Meringue Pies are perfect for a special occasion, a delightful afternoon tea, or simply when you want to bring a little extra sunshine into your day. The crisp, buttery pastry, the zesty, tangy lemon filling, and the sweet, airy meringue come together in a symphony of textures and flavours that are simply irresistible. We’ll be making individual tartlets, which are perfect for portioning and look so charming. Let’s get baking!
Ingredients:
Making the Pastry
This is our base, the sturdy foundation for our delightful pie. We’re making a simple sweet shortcrust pastry that will be wonderfully crisp and buttery.
Blind Baking the Tartlet Cases
This step is essential for a crisp pastry base that won’t become soggy from the filling.
Crafting the Luscious Lemon Filling
This is where that vibrant, tangy flavour comes from!
Whipping Up the Dreamy Meringue
The perfect fluffy cloud to top our pies!
The Finishing Touches
Our daisy element!
Enjoy your absolutely delightful Daisy Lemon Meringue Pies! They are a true celebration of flavour and beauty.
Conclusion:
I hope you’re feeling inspired to create your own slice of sunshine with this Daisy Lemon Meringue Pie recipe! This dessert is truly a showstopper, offering a delightful balance of tart, zesty lemon curd nestled within a crisp, buttery crust, all crowned with billowy, sweet meringue. It’s the perfect treat for any occasion, from a casual Sunday brunch to a more formal gathering. The vibrant yellow filling and cloud-like topping make it visually stunning, and the taste is simply unforgettable. I encourage you to give this Daisy Lemon Meringue Pie a try; you won’t be disappointed!
For serving, a generous slice is usually all you need, but consider pairing it with a dollop of fresh whipped cream or a scattering of fresh berries for an extra touch of elegance. If you’re feeling adventurous, consider variations like adding a hint of lavender to your meringue or using a grabeef ham cracker crust for a different flavor profile. The possibilities are as bright as a daisy!
Frequently Asked Questions:
Can I make the lemon curd ahead of time?
Absolutely! The lemon curd can be made up to 2-3 days in advance and stored in an airtight container in the refrigerator. This is a great way to save time on the day you plan to assemble your Daisy Lemon Meringue Pie.
My meringue is weeping. What did I do wrong?
Meringue weeping is often caused by under-baking or by having too much moisture in the meringue mixture. Ensure your sugar is fully dissolved before adding egg whites, and bake the meringue at a slightly lower temperature for a longer period to allow it to dry out properly. Also, avoid making meringue on very humid days, as excess moisture in the air can contribute to weeping.
Can I freeze Daisy Lemon Meringue Pie?
While it’s best enjoyed fresh, you can freeze unfrozen pie components. The lemon curd can be frozen in an airtight container for up to a month. Meringue is trickier to freeze successfully as it can lose its texture, so it’s generally best to make it just before assembling.
Daisy Lemon Meringue Pies
Individual lemon meringue pies with a crisp shortcrust pastry and a tangy lemon filling topped with fluffy meringue. A delightful dessert for any occasion.
Ingredients
-
125g plain flour
-
35g icing sugar
-
60g cold unsalted butter
-
1 large egg yolk
-
1 tbsp water
-
200g caster sugar (for filling)
-
4 large egg whites (for meringue)
-
75g caster sugar (for meringue)
-
100ml fresh lemon juice
-
2 tbsp cornflour
-
50g unsalted butter (for filling)
-
2 large eggs (for filling)
Instructions
-
Step 1
For the pastry: Rub the butter into the flour and icing sugar until it resembles breadcrumbs. Mix in the egg yolk and water to form a smooth dough. Wrap in cling film and chill for 30 minutes. -
Step 2
Preheat oven to 180°C (160°C fan/Gas Mark 4). Roll out the pastry and line 4 individual pie tins. Prick the bases with a fork and blind bake for 10-12 minutes. -
Step 3
For the filling: Whisk together caster sugar, cornflour, lemon juice, eggs, and egg yolks in a saucepan. Cook over a low heat, stirring constantly, until thickened. Remove from heat and stir in the butter until melted and smooth. -
Step 4
Pour the lemon filling into the blind-baked pastry cases and return to the oven for 5-7 minutes. -
Step 5
For the meringue: Whisk the egg whites until stiff peaks form. Gradually add the caster sugar, whisking until smooth and glossy. Spoon or pipe the meringue over the lemon filling, ensuring it touches the edges of the pastry to prevent shrinking. -
Step 6
Bake in the preheated oven for 15-20 minutes, or until the meringue is golden brown. Allow to cool completely before serving.
Important Information
Nutrition Facts (Per Serving)
It is important to consider this information as approximate and not to use it as definitive health advice.
Allergy Information
Please check ingredients for potential allergens and consult a health professional if in doubt.