Easy Fried Pickle Dip Dairy-Free Delicious
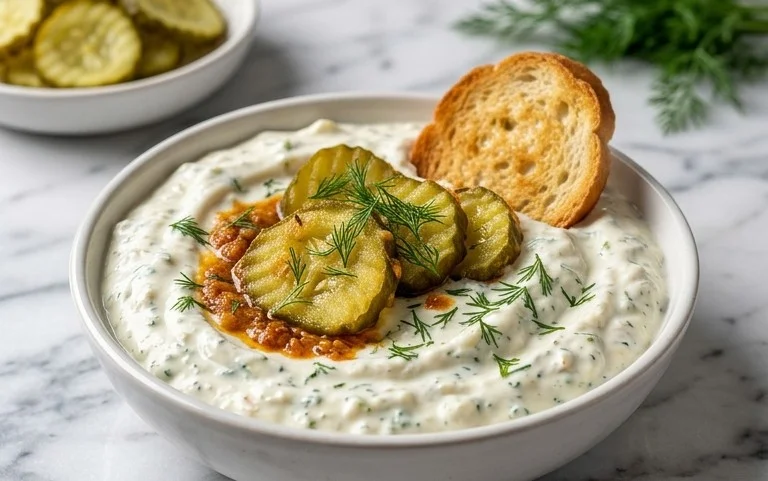
Easy Fried Pickle Dip is about to become your new obsession. Seriously, if you’re anything like me, the tangy, salty, crispy magic of fried pickles is already a weakness. Now, imagin extracte all that incredible flavor transformed into a creamy, dippable sensation that’s perfect for game nights, parties, or just a seriously satisfying snack attack. This isn’t just any dip; it’s a flavor explosion that captures the essence of everyone’s favorite fried appetizer. What makes this Easy Fried Pickle Dip so special? For starters, it’s unbelievably simple to whip up, meaning you can satisfy those pickle cravings in minutes. Plus, I’ve included a fantastic dairy-free option, so everyone can join in on the deliciousness, making this Easy Fried Pickle Dip a crowd-pleasing winner no matter your dietary needs.
Easy Fried Pickle Dip (Dairy-Free Option)
Who doesn’t love fried pickles? That tangy crunch is pure joy! But what if I told you that you could capture all that deliciousness in a creamy, dreamy dip that’s surprisingly easy to make? Even better, I’ve got a fantastic dairy-free option so everyone can get in on this appetizer goodness. This Fried Pickle Dip is going to be your new go-to for game nights, parties, or just a cozy night in with a good movie. It’s a crowd-pleaser with minimal effort, and the crispy topping adds that extra something special. Let’s get dipping!
Ingredients:
Let’s Get Cooking!
This recipe is delightfully straightforward, but a few steps ensure you get that perfect creamy texture and a delightful crispy topping. We’ll tackle the creamy base first, then focus on that irresistible crunch.
Step 1: Prepare the Creamy Base
First things first, let’s get our creamy foundation ready. For the best results, it’s ideal if your sour cream and cream cheese are at room temperature. This allows them to blend together smoothly without any lumps. If you’re using the dairy-free options, the same applies – let them soften a bit. In a medium-sized mixing bowl, combine the 16 oz container of sour cream and the 10 oz of cream cheese. If you’re going dairy-free, I highly recommend using a plain, unsweetened dairy-free cream cheese alternative like Kite Hill. It has a fantastic texture and a neutral flavor that won’t overpower the pickles.
Using a hand mixer or a sturdy spatula, beat the sour cream and cream cheese together until they are completely smooth and well incorporated. You want a cohesive, creamy mixture. Take your time here; a smooth base is key to a luxurious dip. Don’t rush this step! A well-blended base will make all the difference in the final texture of your dip.
Step 2: Infuse with Pickle Flavor
Now for the star of the show: the pickles! Finely chop your 1 cup of dill pickles. The smaller the chop, the more evenly the pickle flavor will distribute throughout the dip. You can even give them a quick pulse in a food processor if you prefer a more uniform texture, but hand-chopping is perfectly fine. Add the chopped pickles to your cream cheese and sour cream mixture.
Next, we’ll add 2 tablespoons of pickle juice. This is where we really amp up that signature tangy pickle flavor. Don’t skip this; it’s crucial for that authentic fried pickle taste. Along with the pickle juice, stir in 1 tablespoon of Worcestershire sauce. This adds a touch of umami and depth that complements the pickles beautifully.
Step 3: Seasoning and Fresh Herbs
With our core flavors in place, it’s time to add the seasonings. Add 2-3 tablespoons of freshly chopped dill. Fresh dill is superior here for its bright, herbaceous flavor. If you can’t find fresh dill, you can use 1 tablespoon of dried dill, but the fresh stuff really shines. Now, sprinkle in 1/2 teaspoon of garlic powder and 1/4 teaspoon of onion powder. These are essential aromatic building blocks that enhance all the other flavors without being overpowering.
The secret weapon for that irresistible dip flavor is ranch seasoning. Add 2 tablespoons of your favorite ranch seasoning. If you’re making this dairy-free, ensure your ranch seasoning blend is dairy-free as well. I often make my own ranch seasoning, which gives me control over the ingredients. Finally, taste your dip and add salt as needed. The amount of salt will depend on the saltiness of your pickles and ranch seasoning, so it’s best to season to your personal preference. Stir everything together until it’s all beautifully combined.
Step 4: Chill and Marry Flavors
This step is optional but highly recommended for the best flavor development. Once everything is mixed, cover the bowl with plastic wrap and refrigerate the dip for at least 30 minutes, or ideally for an hour. This allows all those wonderful flavors to meld together. When the flavors have a chance to get to know each other, the dip becomes so much more complex and delicious. Think of it as letting the ingredients have a little party in the fridge! The texture will also firm up slightly, which is perfect for dipping.
Step 5: Create the Crispy Topping
While the dip is chilling, let’s prepare our crunchy topping. In a small skillet, melt 1 tablespoon of butter (or your dairy-free butter alternative) over medium heat. Once the butter is melted and slightly bubbling, add the 3/4 cup of Panko breadcrum extractbs. Stir the Panko frequently, toasting them until they are golden brown and crispy. This usually takes about 3-5 minutes. Keep a close eye on them, as Panko can go from perfectly toasted to burnt very quickly! The goal is a beautiful golden hue and a satisfying crunch.
Once toasted, immediately remove the Panko from the skillet and spread them out on a plate or a small baking sheet to cool slightly. This prevents them from steaming and becoming soggy.
Assembly and Serving
Once your dip has chilled and the Panko has cooled, it’s time to assemble! Spoon the creamy fried pickle dip into your favorite serving bowl. Now, generously sprinkle the toasted Panko breadcrum extractbs over the top of the dip. You want a good, even layer of that delicious crunch.
Serve your Easy Fried Pickle Dip with an assortment of dippers. Tortilla chips, sturdy crackers, fresh vegetable sticks like celery, carrots, or bell peppers, and of course, extra dill pickle spears are all fantastic choices. This dip is so flavorful and addictive, you might want to make a double batch! Enjoy every tangy, creamy, crispy bite!
Conclusion:
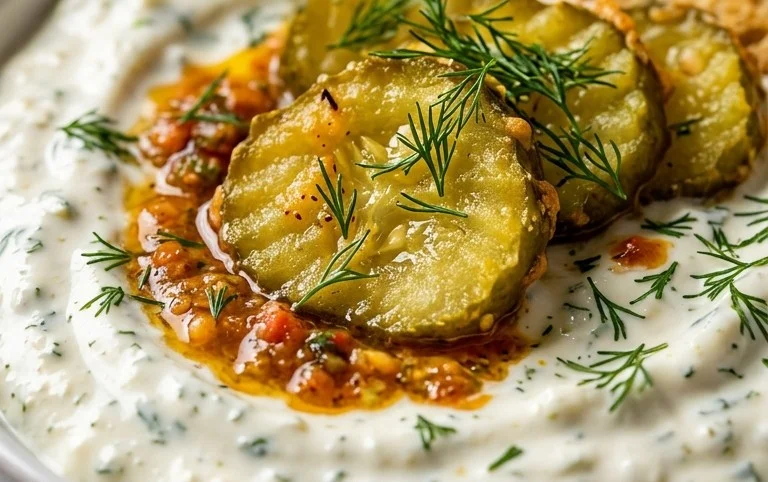
Well, there you have it! This Easy Fried Pickle Dip is a true crowd-pleaser, perfect for game nights, casual get-togethers, or just a satisfying snack any day of the week. The tangy dill pickles, crispy fried exterior, and creamy dipping base (with a fantastic dairy-free option!) create an irresistible flavor and texture combination that’s hard to beat. It’s surprisingly simple to whip up, meaning less time in the kitchen and more time enjoying deliciousness with friends and family.
I highly recommend serving this glorious dip with a variety of dippers. Classic choices like tortilla chips, potato chips, and sturdy crackers are always winners. For a slightly healthier twist, consider serving it with fresh vegetable sticks such as carrot sticks, celery sticks, bell pepper strips, or even cucumber slices.
Don’t be afraid to get creative with variations! If you love a little heat, add a pinch of cayenne pepper or a dash of hot sauce to the dip mixture. You could also experiment with different herbs like fresh chives or parsley for an extra burst of freshness. The possibilities are endless, and that’s what makes this recipe so much fun to adapt to your own taste preferences. I truly hope you give this Easy Fried Pickle Dip a try – I’m confident you’ll love it as much as I do!
Frequently Asked Questions:
Can I make the fried pickle pieces ahead of time?
While the dip itself can be made a few hours in advance and stored in the refrigerator, it’s best to fry the pickle pieces just before serving. This ensures they remain wonderfully crispy and don’t become soggy. However, you can prepare the pickle slices and the batter mixture ahead of time to save a few minutes when you’re ready to fry.
What kind of pickles work best for this recipe?
Dill pickle spears or chips are generally the best choice for this recipe. They offer the perfect balance of tangy flavor and a firm texture that holds up well to frying. Avoid sweet pickles or bread-and-butter pickles, as their flavor profile will significantly alter the outcome of the dip. Ensure your pickles are well-drained and patted dry before breading.
Easy Fried Pickle Dip (Dairy-Free Option)
A creamy and tangy dip inspired by fried pickles, with a dairy-free option available. Perfect for parties and gatherings.
Ingredients
-
16 oz container sour cream (can sub dairy free)
-
10 oz cream cheese (can sub dairy free)
-
1 cup dill pickles, chopped
-
2 tbsp pickle juice
-
1 tbsp Worcestershire sauce
-
2-3 tbsp fresh dill
-
1/2 tsp garlic powder
-
1/4 tsp onion powder
-
2 tbsp ranch seasoning
-
salt to taste
-
3/4 cup Panko breadcrumbs
-
1 tbsp butter (or dairy-free butter)
Instructions
-
Step 1
In a medium bowl, combine the sour cream and cream cheese. If using dairy-free alternatives, ensure they are well-mixed and smooth. -
Step 2
Add the chopped dill pickles, pickle juice, Worcestershire sauce, fresh dill, garlic powder, onion powder, and ranch seasoning to the bowl. -
Step 3
Stir all ingredients together until well combined. Season with salt to taste. -
Step 4
In a separate small skillet, melt the butter (or dairy-free butter) over medium heat. -
Step 5
Add the Panko breadcrumbs to the melted butter and toast until golden brown and crispy, stirring frequently. This should take about 3-5 minutes. -
Step 6
Spoon the toasted Panko breadcrumbs over the top of the dip before serving.
Important Information
Nutrition Facts (Per Serving)
It is important to consider this information as approximate and not to use it as definitive health advice.
Allergy Information
Please check ingredients for potential allergens and consult a health professional if in doubt.